Beautifully Brightened High Key Portrait of A Baby
 |
|
|
Photography shines only if you carry out a good editing process or you may call that developing of photos in your dark room. Nowadays people are taking photos not only with Digital Camera but also with Mobiles and it is not that the quality is poor, the basic thing which is required is the talent of snapping a photo and then editing it in your own style. In today's digital world Adobe Lightroom plays a vital role in photo developing method. When you wish to show happiness than for that you go for High Key Process and this process brightens your clients happiness as this is a very powerful method of showcasing the happiness and joyous moment of a person as you can say of a Baby or Bride's photo, if you go with High Key Process it will add some creativeness in your editing and way of presenting the moment. Therefore, today I wished to go on with the High Key Processing method with some examples so that you can also follow the method and try out this method of editing. One of the great features of Adobe Lightroom is that you don't have to worry about the original image.
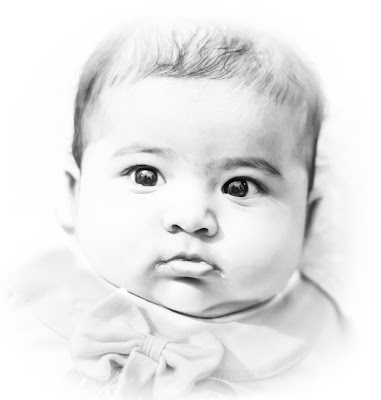
This is the process where we try to remove dark shadows and bringing up the exposure. This is mostly done in black and white form though it's a choice whether you wish to keep your photo in color or black and white.
This is one of the Portrait of my Daughter after editing in Adobe Lightroom and this Photo is taken with Nikon D5500 with 50mm Lens, Aperture - f/2.2, Shutter Speed - 1/125 sec and ISO - 800.
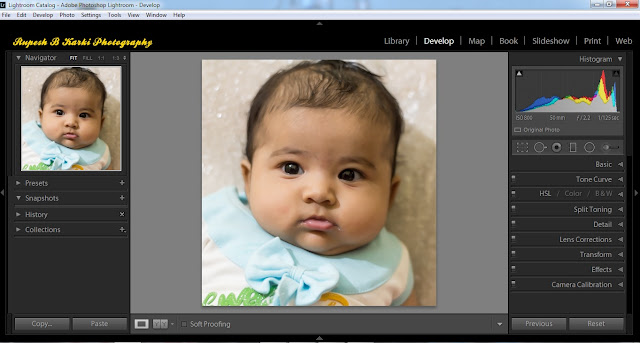 |
| Original Image after Import in Lightroom |
For this post, I will try to present the approximate settings in Adobe Lightroom. Basically, these settings depend on your camera settings and you may have to edit more or less than the below-mentioned settings.
The first process is to Import the photo into Lightroom and that photo will appear in Library of Lightroom. Press D and you will be directed to Develop Module of Lightroom, go to Basic and set the exposure around +1 or +2 or it may be more than this depending on the exposure and Contrast approximately +40 to +80.
The Second Process is to turn it into Black and White and for this, you have to simply select B & W. This is purely your interest how you wish to set its Black and White Mix.
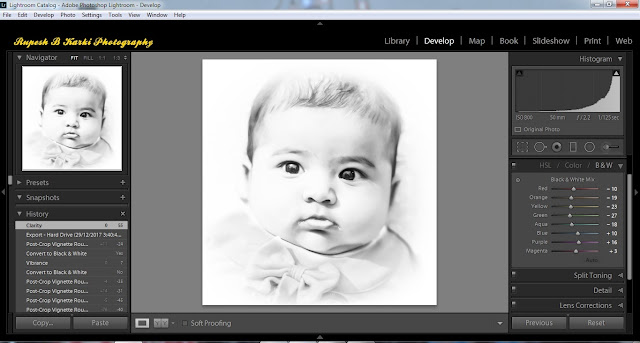 |
| Black & White Mix |
The Third Process is to Soften
the image and for that, you have to increase or decrease the Highlights
that may be around +10 or -10 and the Shadows, Whites and Blacks these
should be kept approximately +35 to +45 depending on the exposure of the
photograph that you are editing. Clarity depends on the sharpness of the image.
 |
| Softening Process |
The Fourth Process is Tone Curve
and this depends on you if you further wish to move up you can, like
Highlights upto+20, Dark - +50 and Shadows - +35. This totally depends
on you, that how far you wish to increase the brightness and then you
have to even select the Point Curve, that can be Medium or Strong
Contrast. I didn't apply this process as it was not required for the portrait I am editing.
The Fifth Process is Effect
and this is for creating White Edges. You have to go to Effects, Post
Crop Vignette and increase the Amount around +60 and Roundness around
-40.
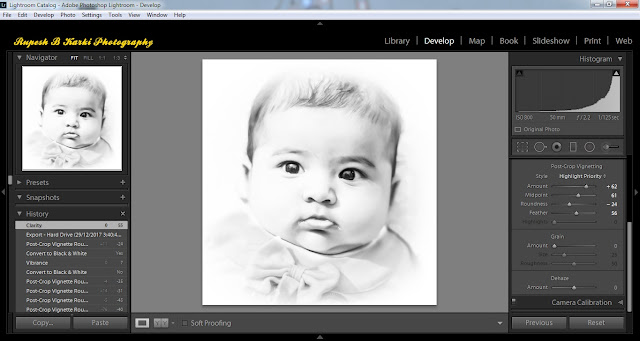 |
| Post Crop Vignette |
The Sixth and the Last Process is to apply Adjustment Brush using Burn (Darken). This is just to highlight hair, eyes, nose, etc. this is a sort of Dodging and Burning Process in order pop up the effect.
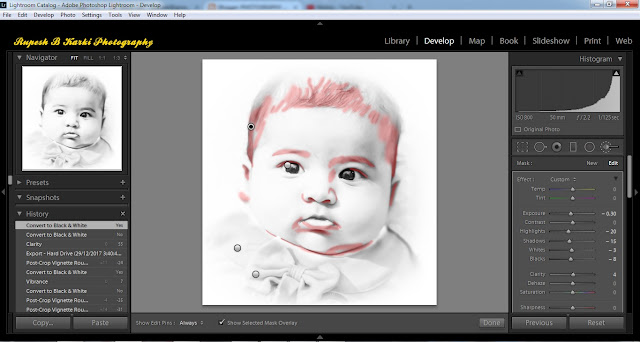 |
| Last Process of Dodge & Burn |
Transformation of A Portrait in High-Key
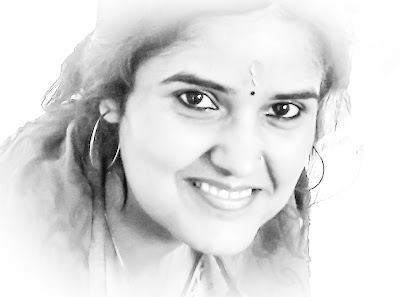
One of my friend's photo snapped with a mobile and edited with Adobe Lightroom that I wish to share with my blog readers so that they can understand the ample possibilites of transforming a portrait from a normal portrait photo to a beautifully brightened photo with the process of editing in Lightroom and its after effects as a final image. The editing for the below photo was quite different or you can say settings used to increase exposure were more than the above-mentioned figures as it was underexposed photo. Before importing in Adobe Lightroom, I even increased the Pixels of this image in Adobe Photoshop in order to increase the quality of this image. For this Photo I used Burn (Darken) and Dodge (Lighten) Adjustment Brush Tool in Lightroom in order to pop out the features of the Subject.
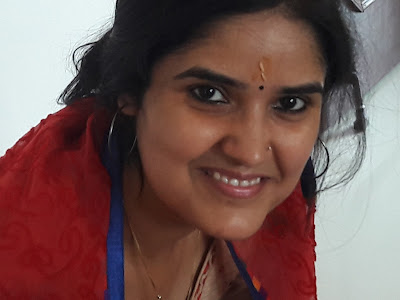 |
| Original Image without Any Editing Direct From The Mobile Camera |
The conclusion is the editing in High Key increases the intensity and beauty of happiness that can be understood with the above two pictures. This post is basically for enhancing the requirement of editing photos and showing that we can emphasize on what we wish to show. It means a good photography along with good and meaningful editing gives the feel and effect of icing on the cake. Kindly, let me know by commenting and sharing your opinion and experience, whether you agree with me regarding Photography and Photo Editing.




Streaming videos are the most common thing which a number of people like to do in their free time
ReplyDeletetubemate apk download
Thank you for sharing information. Wonderful blog & good post.Its really helpful for me, waiting for a more new post. Keep Blogging!
ReplyDeleteBest Candid Wedding Photographers in Lucknow
How to avoid Errors hiring-a-candid-wedding-photographer-in-lucknow
Best Candid Wedding Photographers in lucknow
Thank you!!!
DeleteThanks for sharing the information. I found the information very useful. That’s an awesome story you posted. I will come back to scan some more.
ReplyDeleteThanks Clipping Path for appreciating my work...
DeleteVery Informative one.
ReplyDeleteBasic settings in the camera